Discover expert strategies to prevent 3d print spaghetti and achieve flawless prints. Learn to optimize your 3D printer filament usage, adjust settings, and maintain perfect bed adhesion for superior 3D print results.
VP of Global Sales & Co-Founder, 3D Control Systems (creators of 3DPrinterOS)
What Causes 3D Print Spaghetti?
A 3D print spaghetti failure occurs when the printer continues extruding filament after the model has detached, shifted, or failed during the printing process. Common causes include:
Poor bed adhesion
Incorrect nozzle temperature
Filament jams
Improper retraction settings
Incorrect Z-offset
Mechanical instability
Printing too fast
To avoid spaghetti 3d print failures, ensure proper bed leveling, optimize print settings, maintain your printer, and monitor prints during critical stages.
<h2>Battling the Tangle: Strategies to Overcome Spaghetti 3D Printing
3D printing is akin to watching a tangible product of your imagination come to life. But not every print turns out pristine. The notorious 'spaghetti 3D print' can turn a promising creation into a frustrating mess of filament. These tangled disasters are not just eyesores; they represent wasted time, materials, and energy. <h2>What Is a Spaghetti 3D Print?
A spaghetti 3D print is one of the most common print failures in FDM 3D printing. Instead of depositing material onto the model, the printer extrudes filament into open air, creating a tangled mess that resembles cooked spaghetti.
This issue may occur:
During the first few layers
Halfway through a print
Near the completion of a print
After the model detaches from the build plate
Understanding what causes spaghetti failure in 3D printing is the first step toward preventing it.
<h2>Decoding the Spaghetti 3D Print Predicament
Imagine walking into your workspace, anticipating a finely printed model, only to be greeted by what looks like a bird's nest where your object should be. This scenario is far too common in the realm of 3D printing, where filament oozing out uncontrollably from the nozzle wreaks havoc, leaving a heap of what resembles overcooked spaghetti instead of the intended design.
What causes spaghetti 3D printing is often a mix of technical missteps—ranging from temperature mismanagement and speed issues to poor bed adhesion and retraction errors. Understanding what causes spaghetti 3D printing is crucial in developing a reliable printing process.
<h2>Why Does a 3D Print Turn Into Spaghetti?
The most common causes of a 3D print turns into spaghetti failure include:
Cause
Impact
Poor bed adhesion
Model detaches from bed
Nozzle clog
Interrupted extrusion
Excessive print speed
Layer instability
Incorrect temperature
Over or under extrusion
Retraction issues
Stringing and failed travel moves
Filament tangles
Interrupted filament feed
Layer shifts
Misaligned print structure
Incorrect Z-offset
Weak first layer
Diagnosing the root cause helps eliminate repeat failures and improve overall print reliability.
<h2>The Culprit: High Temperatures and Melty Messes
High temperatures are often the chief instigator. They can transform your 3D printer filament into an overly fluid state, causing it to dribble out in excess. Filaments such as PLA have specific temperature needs—typically between 180-220°C. Straying outside these optimal ranges spells disaster.
Tweaking temperatures is key, and platforms like Cura provide user-friendly interfaces to manage these settings with ease.
New printers often encounter 3d printer spaghetti issues due to incorrect temperature profiles being used for the filament type. Overheating can cause oozing and create an unintended spaghetti 3D print effect.
Temperature Best Practices
To reduce the risk of filament spaghetti:
Follow manufacturer-recommended temperatures
Run temperature tower tests
Avoid excessive nozzle temperatures
Store filament properly to prevent moisture absorption
Wet filament can also contribute to poor extrusion quality and increase the likelihood of spaghetti failures.
Ensuring Optimal Bed Adhesion
Another key player is bed adhesion—or the lack thereof. A first layer that doesn't stick spells trouble. The model may shift or detach completely, leaving the nozzle to extrude aimlessly, resulting in a plate of filament spaghetti.
Adhesives and careful calibration can secure your print, ensuring that it doesn't become airborne mid-print.
Beginners often wonder how to avoid 3d printing spaghetti, and one of the first lessons is to master first-layer adhesion.
First-Layer Checklist
Before starting a print:
Clean the build plate thoroughly
Verify bed leveling
Adjust Z-offset
Use proper bed temperatures
Slow down first-layer speed
Apply adhesives when required
A strong first layer is often the difference between a successful print and a spaghetti failure.
Filament jams are as problematic as they sound. A clogged nozzle, an incorrect filament diameter, or even dusty filament can obstruct the smooth flow required for a flawless print.
Regular maintenance and using filaments that match your printer’s specifications are simple yet effective measures against this.
Additional Filament Feed Checks
Inspect:
Filament spool movement
Extruder gears
Bowden tube condition
Nozzle wear
Filament moisture content
Many filament spaghetti failures are caused by interrupted filament delivery rather than slicer settings alone.
Spaghetti failures are often viewed as a nuisance, but their impact extends far beyond wasted filament. A study published through ScienceDirect found that actual energy consumption in FDM printing can be approximately 50% higher than ideal process estimates when failed prints and human error are considered. Researchers also found that material losses from failed builds were approximately 2.22 times higher than estimates derived from controlled printing environments. As organizations increase printer utilization, identifying failures early becomes increasingly important for controlling costs and improving operational efficiency.
Speed Thrills but Kills your 3D Print
Overzealous print speeds can make for spectacular failures. While it's tempting to rush a print, excessive speed can cause the extruder to lag or overcompensate, leaving behind a trail of unwanted filament strands.
Adjusting speed settings is a necessary step to maintain the integrity of your print.
Spaghetti 3D printing can also result from inconsistent extrusion rates caused by printing too fast. Slowing down your print can reduce the chances of encountering a 3d printer spaghetti mess.
For functional parts and large-format prints, prioritize print consistency over speed. Small reductions in print speed often produce significantly more reliable results.
The Delicate Dance of Retraction Settings
In spaghetti 3D printing, retraction settings play a pivotal role. Incorrect settings here can mean the difference between a smooth print and a stringy mess.
The retraction function pulls back the filament to prevent oozing as the nozzle jumps from one print area to another.
Finding the sweet spot for retraction distance and speed is essential for clean, crisp prints.
Adjusting retraction is one of the most effective ways to prevent 3d print spaghetti and improve print clarity.
Retraction Settings to Review
Retraction distance
Retraction speed
Travel speed
Combing mode
Z-hop settings
Every filament behaves differently, so calibration prints are recommended whenever changing materials.
Low Z-Offset: A High-Stakes Setting
The Z-offset, the distance between the nozzle and the print bed, if set too low, can squash the filament against the bed, causing it to spill out of bounds.
Calibrating this distance optimizes filament flow and adhesion, contributing significantly to the quality of the final print.
<h2>Why Does a 3D Print Spaghetti Halfway Through?
One of the most frustrating failures occurs when a 3d print spaghetti halfway through an otherwise successful print.
This typically happens because:
The print detached after several hours
Supports failed
Layer shifting occurred
The nozzle collided with the model
Filament became tangled
A partial nozzle clog developed
For longer prints, monitoring progress periodically can help identify issues before substantial filament waste occurs.
<h2>Additional Considerations to Prevent 3D Print Spaghetti
One of the simplest ways to avoid 3d printer spaghetti is to run small test prints before initiating a large project.
These tests help you identify weak spots in your settings that could lead to a spaghetti 3D print situation.
Using camera monitoring or AI-based print failure detection systems can help users stop a failed spaghetti 3D printing job before wasting more filament and time.
Technologies that detect what causes spaghetti 3D printing are becoming increasingly common in modern 3D printer ecosystems.
<h2>Remote Monitoring and Print Management
Failed prints are not simply an inconvenience. They represent wasted material, machine time, and production capacity. A recent industry poll found that failed prints account for approximately 31% of 3D printing waste, second only to support structures at 41%. For organizations managing multiple printers, identifying problems early can help reduce waste while improving printer utilization and workflow efficiency.
For print farms, educational labs, and manufacturing environments, remote monitoring tools can help identify:
Print detachment
Filament runout
Layer shifts
Extrusion failures
Early-stage spaghetti formation
Monitoring capabilities help reduce wasted material, printer downtime, and failed print jobs.
<h2>Step-by-Step Troubleshooting Checklist
If your print turns into spaghetti:
Step 1: Check bed adhesion. Step 2: Verify nozzle and bed temperatures. Step 3: Inspect for nozzle clogs. Step 4: Check filament movement and spool condition. Step 5: Review retraction settings. Step 6: Inspect belts, pulleys, and frame stability. Step 7: Run a small calibration print before restarting production.
<h2>Preventative Maintenance Tips
To reduce the risk of future spaghetti failures:
Clean build surfaces regularly
Replace worn nozzles
Inspect belts and pulleys
Keep filament dry
Maintain proper extruder tension
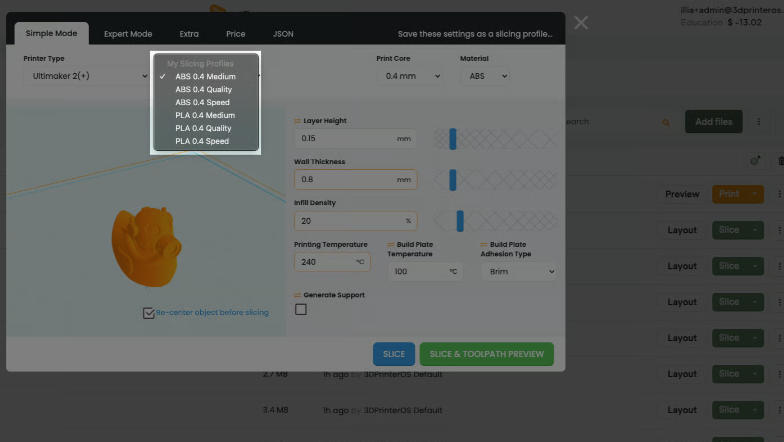
Update slicer profiles when switching materials
A preventative maintenance routine improves consistency and reduces print failures over time.
<h3>Preventing Spaghetti Failures Across Multiple Printers
While troubleshooting a single printer is relatively straightforward, managing reliability across an entire printer fleet presents additional challenges. Educational institutions, libraries, makerspaces, and engineering teams often support multiple users with varying levels of experience.
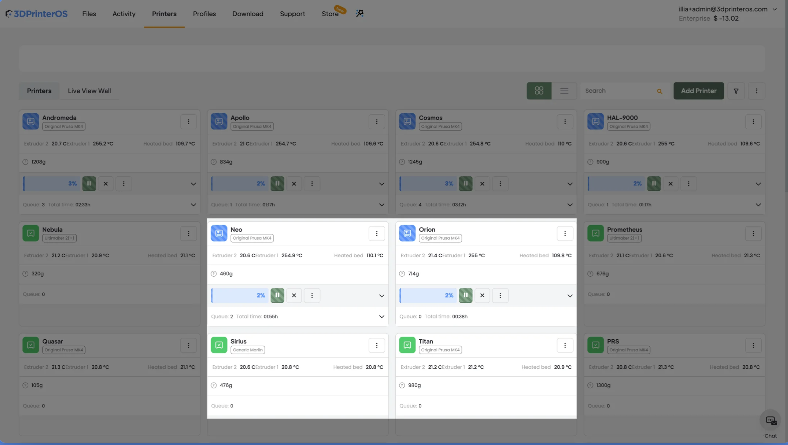
Standardized slicer profiles, approved material settings, print queue controls, and centralized monitoring can help reduce user errors and improve consistency. By establishing structured workflows, organizations can minimize common causes of spaghetti failures while maximizing printer availability and productivity.
Platforms such as 3DPrinterOS support these efforts by providing a centralized environment for managing printers, users, files, and print jobs across an organization. With cloud-based print management, remote monitoring, secure file handling, and access controls, teams can maintain consistent workflows while reducing the risk of failed prints caused by incorrect settings or user mistakes. Whether managing a classroom, makerspace, or large-scale print farm, centralized oversight helps improve printer utilization and operational efficiency.
Ready to reduce print failures and streamline fleet management? Book a Demo to explore how 3DPrinterOS can help your organization monitor, manage, and optimize every printer from a single platform.
Spaghetti 3D printing typically occurs when a print detaches from the bed, shifts position, or encounters extrusion problems while the printer continues extruding filament.
Camera monitoring, AI-based print failure detection, and remote print management solutions can help identify failures before significant filament is wasted.
Rene-Oscar Ariko is the VP of Global Sales and Co-Founder at 3D Control Systems, the company behind 3DPrinterOS. With more than a decade of experience in global business development, SaaS, and additive manufacturing, Oscar has helped scale 3D printing software into a worldwide market. At 3D Control Systems, he expanded adoption to 100+ countries, and built a category-leading platform trusted by NASA, Google, and leading universities. Through his work at 3DPOS, Oscar continues to advance networked 3D printing on a global scale, connecting institutions, enterprises, and users across industries.
Control access, users, and print permissions by team or lab
“This close collaboration has enabled Koenigsegg to tailor the platform to their specific needs, resulting in an optimized and user-friendly system for managing their 3D printers.”
Tim Bäck
Team Leader Koenigsegg Automotive AB
Thank you! One of our representatives will get in touch as soon as possible.
Oops! Something went wrong while submitting the form.


%20(1).webp)





.png)
.png)


